Here we go:
1) Go to http://developers.facebook.com/ and click on Apps as circled below:

2) If you are here the first time, you will be asked for permission.

3) You may also be asked about your phone number to verify your fb account. Do it before the next step.
4) You’ll see the following wizard if you are here the first time. If you’ve set up any other apps before, you’ll be shown a different page which is the summary of the latest app you last developed.
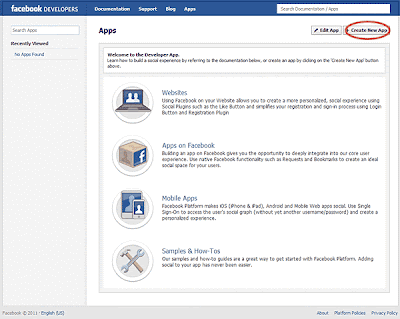
5) Click on “Create New App” and you’ll see this:
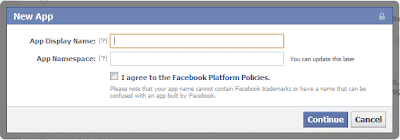
Enter the App Display Name something like “Birthday Calender”. App Namespace is important as it is going to be your app URL: http://apps.facebook.com/[your app name space]. It’s like email name, the name you chose has to be available on the server before you can proceed. Check the agreement and press Continue after you are done.
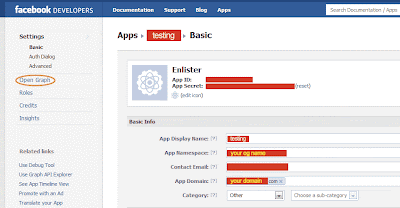
6) You’ll see the App Basic Setting page:

The App (Display) Name and the Namespace are already filled up automatically. You just need to fill up the email and also the website. Please leave the http:// out from the App Domain. You just need something like mydomain.com and then press Enter. Please don’t click the mouse instead of pressing Enter. It won’t work. You can also add an icon in A so that it looks more professional.

You also need to fill the Website and App on Facebook. They can be something like:
http://www.yourdomain.com/fbapps/your_app_namespace/
If you don’t fill up the Secure Canvas URL, you’ll see this warning:

If you don’t have a secure server to run with your app, your account won’t be able to test the app but someone else account can still be running. (as of today 30th of October 2011)
If you don’t have a secure URL set up, you’ll see this when you run your App:

Things change very often and quickly in Facebook. I was allowed to run testing with my account even if I don’t have a secure server to run with a week ago. Now it’s different a week later.
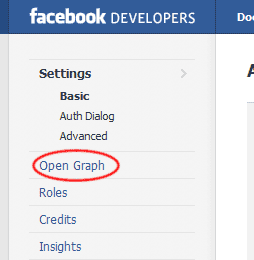
7) Then click on Open Graph on your upper left:
If you run Open Graph for the first time, you’ll see the wizard:
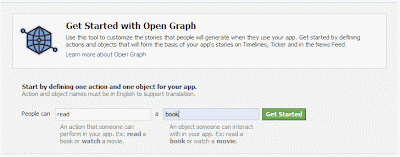
I just put “read” as my action and book as my object. Then I clicked on “Get Started”.
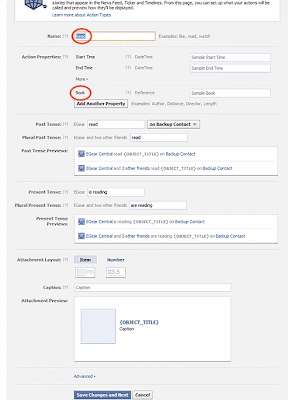
There are 3 parts to it: 1) Action 2) Object 3) Aggregations
I now in Step 3 skipped Step 2 as I've already entered the object in the Wizard window. Anyway, you can change it later on as it is not really important now.
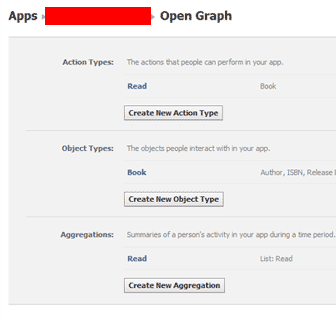
Just press Save and go to the Open Graph Dashboard.
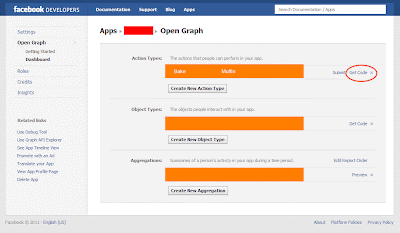
8) Actually the app account is already set up at this point. If you want your app to be able to be published to the public, you’ll need approval. You’ll need to submit your Action (with proper aggregations to back it up) to be approved.
Facebook cannot guarantee that your submission will be approved as your app has to be very “professional” according to the document published.
You can stop here if you don’t need your app to go public.
.
.
.
.
.
.
.
.
.
.
.
If so, let’s continue.
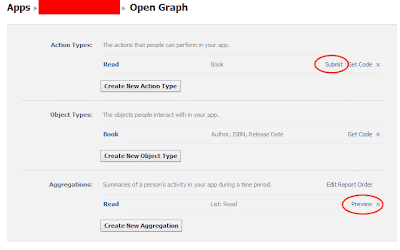
Before the submission, you’ll need to get the aggregations set up properly or you’ll see this error after you click on Submit:
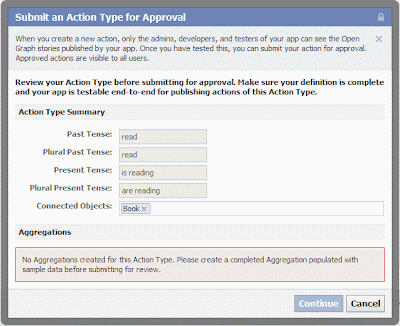
“ No Aggregations created for this Action Type. Please create a completed Aggregation populated with sample data before submitting for review.”
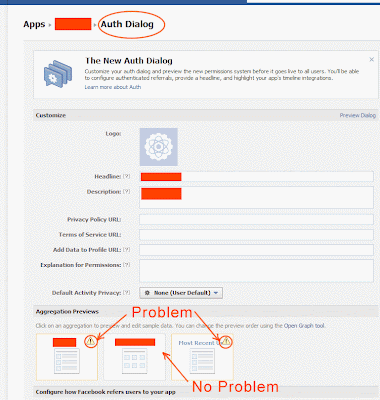
In order to avoid this problem, you’ll need at least a good aggregation set up. Click on Preview on the Aggregations section as circled above.
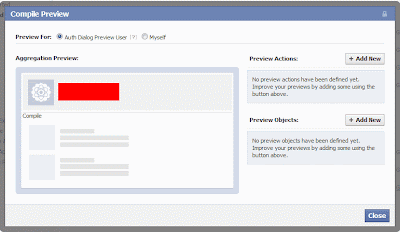
Click on Add New for the Preview Action:
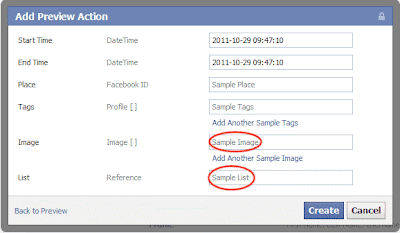
Please make sure you give it a dummy Sample Image by simply getting any image URL and click on the Sample List and a pull down menu will show “Add Custom URL” and a “http://” will appear. Please enter a valid URL anything other than facebook.com. Click on Create after you are done.
Then click on Add New for the Preview Objects. This is the crucial part:
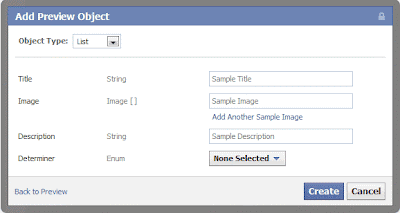
You basically need to fill up everything. DON’T leave anything blank. Click Create after you are done.
Now, here’s the final trick:
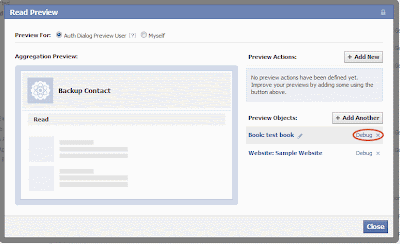
Please DO click on the Debug! You’ll see this:
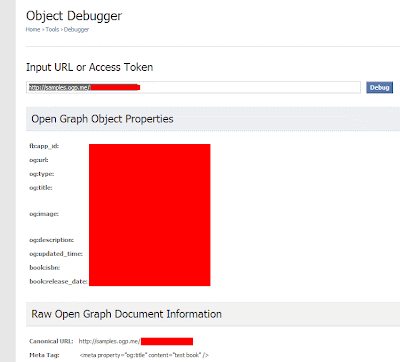
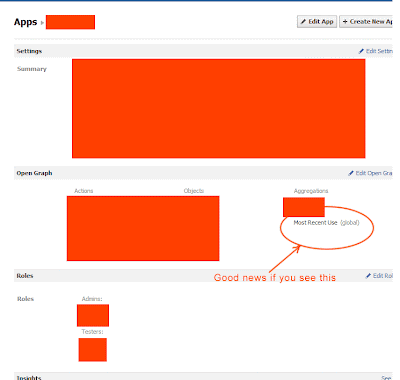
If you don’t see any problem here, you are all set! Go back to the Open Graph dashboard, you’ll see this after you click Submit for the “Read” action:
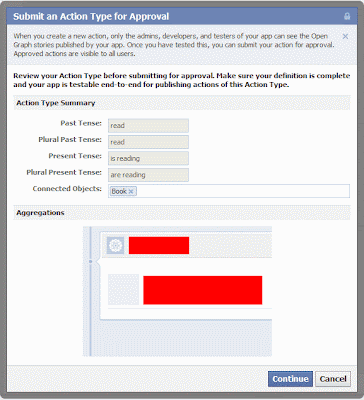
The error about aggregations is gone and you are now ready to submit your action to be approved by Facebook! Congratulations!
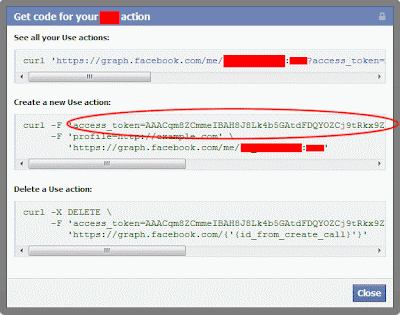
Ya, forgot to tell you how to run the app.
Go here:
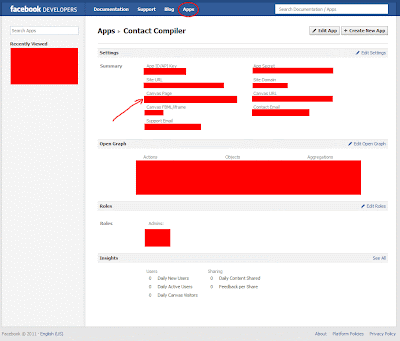
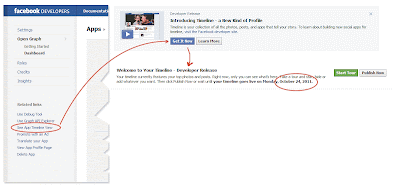
You can click on App on the top panel to reveal the summary page. The Canvas Page URL is your App's wall/profile page.
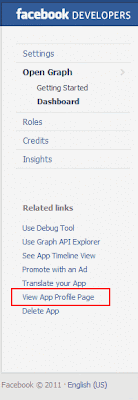
You can also click on "View App Profile Page" on the side panel.
Read More »
1) Go to http://developers.facebook.com/ and click on Apps as circled below:

2) If you are here the first time, you will be asked for permission.

3) You may also be asked about your phone number to verify your fb account. Do it before the next step.
4) You’ll see the following wizard if you are here the first time. If you’ve set up any other apps before, you’ll be shown a different page which is the summary of the latest app you last developed.

5) Click on “Create New App” and you’ll see this:

Enter the App Display Name something like “Birthday Calender”. App Namespace is important as it is going to be your app URL: http://apps.facebook.com/[your app name space]. It’s like email name, the name you chose has to be available on the server before you can proceed. Check the agreement and press Continue after you are done.
6) You’ll see the App Basic Setting page:

The App (Display) Name and the Namespace are already filled up automatically. You just need to fill up the email and also the website. Please leave the http:// out from the App Domain. You just need something like mydomain.com and then press Enter. Please don’t click the mouse instead of pressing Enter. It won’t work. You can also add an icon in A so that it looks more professional.

You also need to fill the Website and App on Facebook. They can be something like:
http://www.yourdomain.com/fbapps/your_app_namespace/
If you don’t fill up the Secure Canvas URL, you’ll see this warning:

If you don’t have a secure server to run with your app, your account won’t be able to test the app but someone else account can still be running. (as of today 30th of October 2011)
If you don’t have a secure URL set up, you’ll see this when you run your App:

Things change very often and quickly in Facebook. I was allowed to run testing with my account even if I don’t have a secure server to run with a week ago. Now it’s different a week later.
7) Then click on Open Graph on your upper left:

If you run Open Graph for the first time, you’ll see the wizard:

I just put “read” as my action and book as my object. Then I clicked on “Get Started”.

There are 3 parts to it: 1) Action 2) Object 3) Aggregations
I now in Step 3 skipped Step 2 as I've already entered the object in the Wizard window. Anyway, you can change it later on as it is not really important now.

Just press Save and go to the Open Graph Dashboard.
8) Actually the app account is already set up at this point. If you want your app to be able to be published to the public, you’ll need approval. You’ll need to submit your Action (with proper aggregations to back it up) to be approved.
Facebook cannot guarantee that your submission will be approved as your app has to be very “professional” according to the document published.
You can stop here if you don’t need your app to go public.
.
.
.
.
.
.
.
.
.
.
.
If so, let’s continue.

Before the submission, you’ll need to get the aggregations set up properly or you’ll see this error after you click on Submit:

“ No Aggregations created for this Action Type. Please create a completed Aggregation populated with sample data before submitting for review.”
In order to avoid this problem, you’ll need at least a good aggregation set up. Click on Preview on the Aggregations section as circled above.

Click on Add New for the Preview Action:

Please make sure you give it a dummy Sample Image by simply getting any image URL and click on the Sample List and a pull down menu will show “Add Custom URL” and a “http://” will appear. Please enter a valid URL anything other than facebook.com. Click on Create after you are done.
Then click on Add New for the Preview Objects. This is the crucial part:

You basically need to fill up everything. DON’T leave anything blank. Click Create after you are done.
Now, here’s the final trick:

Please DO click on the Debug! You’ll see this:

If you don’t see any problem here, you are all set! Go back to the Open Graph dashboard, you’ll see this after you click Submit for the “Read” action:

The error about aggregations is gone and you are now ready to submit your action to be approved by Facebook! Congratulations!
Ya, forgot to tell you how to run the app.
Go here:

You can click on App on the top panel to reveal the summary page. The Canvas Page URL is your App's wall/profile page.

You can also click on "View App Profile Page" on the side panel.
